Wednesday, June 10, 2020

Beauty & the Beast Birthday Party

I've been meaning to write this post for two years now, but better late than never!

It seems like our second daughter is always lucky enough for her birthday to fall right around the time of a new hit Disney movie!  In 2017 it was the live action Beauty and the Beast.  We set to work gathering supplies and crafting!  

My grandmother's tea set, rose in a vase, homemade cupcakes, "grey stuff"
Gaston's tavern, Lumiere's goodies and baguettes from the baker
"West Wing" sign, more homemade cupcakes, birthday girl and her new b&b purse
table all set for our Guests!
Fancy up-do for the birthday girl.  

We pulled out our fanciest lace tablecloths, china dishes and tea set to set a table fit for the best guests.  We planned a menu carefully based on the animated Beauty and the Beast movie (since we were headed to see the live action movie during the party and hadn't seen it yet).   Gaston's Tavern served deviled eggs and Rootbeer.  The baker left a basket of mini baguettes too.  For Lumiere's plate of tasty snacks we made pickle rolls, mini pigs in a blanket and a variety of sandwiches cut into little squares.  For dessert the cupcakes were traditional vanilla and chocolate.  Chocolate cupcakes were decorated with buttercream frosting to look like Cogsworth and the vanilla cupcakes were topped with yellow buttercream and Wilton red roses bought from www.michaels.com.  


The Gray Stuff

Ingredients:

  • 1 vanilla pudding mix
  • 1 chocolate pudding mix
  • 1 1/2 cups milk
  • 12 - 18 Oreo cookies
  • 8 oz cool whip
  • white round sprinkles

Instructions
Some of the ingredient measurements are approximate as colors vary and the goal is to end up with a gray colored concoction.  

Mix entire vanilla pudding package and 2-4 tablespoons chocolate pudding mix with milk.    Mix and refrigerate.  Crush Oreo cookies in food processor.  Add crushed Oreos cookies to pudding mixture.  Fold in Cool Whip to pudding mixture and refrigerate at least one hour.  

To serve, place half in piping bag with desired tip.  Place a dollop of Gray Stuff in each bowl, use piping bag to swirl additional Gray Stuff around dollop.  Top with white sprinkles. 

The Gray Stuff


I found some adorable printable Chip teacups at Brit+co.  There are also cupcake wraps, but we did not use those.  The Brit+co Beauty and the Beast party can be found here: https://www.brit.co/beauty-beast-dinner-party/


Free printables I created:

food labels printable jpg.  Click to enlarge, right click to save

food labels printable jpg.  Click to enlarge, right click to save
West Wing printable jpg.  Click to enlarge, right click to save


Wednesday, January 27, 2016

Kitten Birthday

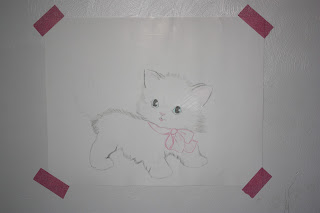
I bought a collection of kitten clip art from TheDigitalChick on Etsy.  How can this cute little fluff ball not inspire an adorable vintage kitten party?

First, we decided to use the pink color from the kitten's bow and a turquoise accent color, similar to the butterfly's wings and the kitten's eyes.  Then we started making and gathering decorations!    Guests need to know where the bathroom is, so I made a "litterbox" sign to direct them:


I gathered some items from around the house - a couple kitty bowls, some yarn (kittens love yarn) and cute jars to hold the silverware.


I used the kitten clipart to make cupcake toppers.


Now that the scene was set, I needed some activities for the kiddos.   Each guest got to pick a kitten to "adopt."  (I bought all the kittens on amazon affiliate link).  They chose a name and I helped them fill out adoption certificates.  I found these certificates online  (there are puppy ones too) and then glued a cutout of the kitten clipart on the top.


Once the kittens were adopted and named, they needed a place to sleep.  I found this tutorial for making little houses out of foam sheets.  The original instructions called for punching holes and tying ribbon to keep all the sides and roof together.  I found that this was not very sturdy, so I hot glued the seams of the houses before the day of the party.  Each kid was then able to decorate a house for their kitten.


The last activity before heading outside to hit the piƱata was Pin the Tail on the Kitten.   I used the kitten clipart as a template and drew a tail-less kitten on poster board.  


Tuesday, January 27, 2015

Childhood Cancer - Close to Home

On Saturday August 23rd, 2014, after a month of mysterious illness, one of my closest friends, Heather's 5 year old son, Damien (LDJ), woke up seeing double.  They headed to the ER where the doctor was unable to immediately determine a cause for his illness.  Damien was put under anesthesia for a 3 hour MRI.  The scans showed a 47.6cm x 39.4cm (size of a large kiwi) mass at the base of his brain.  Doctors decided they would try to remove the tumor as soon as possible, so Sunday morning August 24th, with five minutes notice, Damien was wheeled in to surgery at UCD Med Center in Sacramento.  After about 7 hours, the surgeons had removed 99% of the tumor.  

During recovery from surgery Damien dealt with feeding tubes, breathing tubes, irritated incision sites, fevers and an ear infection.  He couldn't seem to pass the swallow test, even when offered ice cream.  Finally, on Tuesday September 2nd, he graduated from the Pediatric Intensive Care Unit to Pediatric Services!  He even attempted to get out of bed and walk.  

Biopsy results on the tumor determined that Damien has Medulloblastoma - now with a diagnosis they could figure out his course of treatment.  Second opinions were received from Boston and San Francisco so that Damien could be referred to St Jude's hospital in Tennessee.  So after more than a month in the Sacramento hospital, on Saturday September 27th Damien was discharged and able to spend one night at home before getting on an airplane with his mom to be checked into St. Jude's.  Damien did well on his overnight flight, considering how uncomfortable he was feeling. His dad met them at St. Jude's after driving 2,100 miles to get there.

Friday, October 3rd Damien went into surgery again, this time in Tennessee, to have the remainder of his brain tumor hopefully removed.  Surgery and MRI were done by noon that day!  He had another MRI on the 7th that, praise God, showed all the tumor had indeed been removed!  However he faced another set back when doctors had to re-admit him to the hospital to treat him for meningitis.  Damien finally started radiation therapy the third week of October and continued through November.  His mom (Heather) had to return to California for work and to be with their other two children, so she missed seeing Damien run and ride a bike for the first time since July, as he finally began to heal.  But his dad kept mom updated via text and videos   After 6 weeks of radiation treatments, Damien was so very excited to be reunited as a whole family for Thanksgiving and Christmas.
  
Damien (LDJ) with mom Heather, dad DJ, brothers Robert and Remy

January 4th, 2015 Damien and his family arrived once again in Tennessee - this time for chemotherapy, which will last four months (I hope the hospital has a fun Easter egg hunt for the kiddos!).  So far, he has been tolerating chemo well - some of the meds upset his tummy and it is hard for a 5 year old to sit still so long. 

St. Jude's has been an amazing resource for Heather, Damien and their family.  All Damien's medical care is given free of cost to their family, along with stays in hospital dorms and apartments, access to laundry facilities and a food stipend.  But as much as St. Jude's has blessed their family through this ordeal, cancer has been a financial and emotional strain.  Please see below for ways you can bless Damien's family.


*Donate to Damien's family 
*Donate directly to St. Jude's
*Mail a card or care package
Patient number 42267
1811 Poplar Ave
Target House 1 Rm 204
Memphis, TN 38104
*Say a prayer
*Get involved with childhood cancer research - "An estimated 10,450 new cases of cancer are expected to be diagnosed in children ages 0 to 14 years in 2014.... Although outcomes have improved for many childhood cancers, progress in others has been limited. Brain and central nervous system tumors remain the leading cause of cancer-related death in children." ~National Cancer Institute  

Groups I have supported in the past that are committed to research and supporting families: Keaton Raphael Memorial, St. Bladrick's, Run of Hope Seattle and Northern Nevada Children's Cancer Foundation.  (If you are looking for an organization local to you, sometimes these groups works together or have resources to assist you in finding someone closer to home.)


Thursday, April 3, 2014

Frozen Birthday Party

This winter we went to the movie theater to watch Frozen, like thousands of other families.  When hubby's employer offered all employees and their families and opportunity to see it free, we jumped at the chance to watch it again!  The kids think Olaf the snowman is hilarious.  They love Anna and Elsa's dresses and singing.   And us grown-ups were quite entertained too.

So it was not surprise when daughter #2 asked for a Frozen birthday party.  I knew it would be fun for both of us since I love doing all the crafty things that come with planning an event.  My first stop was the internet.  I hardly google anything anymore, unless I can't find what I am looking for on Pinterest.  I got lots of inspiration from here.  I also checked out Party City's website and saw that they have a good selection of Frozen plates, cups and other party decorations.  During one of our weekly gymnastics trips, we stopped into Party City only to find out they had been sold out of all Frozen related items for more than 6 weeks!  I wasn't looking to buy the whole shebang, but thought I could at least snag some napkins and cups!  So I got creative and made some decorations.  Then I raided both our Christmas decorations and the girls bedroom decorations.  I am excited at how nicely it came together since daughter #1 now wants a Frozen birthday party too!


click to enlarge photos


Where did the decorations come from?
  • The cake plates I bought at Home Goods several years ago.  It is really easy to change the ribbon to match your party theme.  
  • The princess lanterns came from Amazon (affiliate link) for the girls' bedroom.  I just borrowed them for the party.  
  • The paper plates, napkins, cups and tissue pompoms are from Oriental Trading Co.  
  • But I forgot to order the popcorn boxes, so I picked those up at Party City when I was buying tablecloths.  I love buying the plastic tablecloths in rolls so that I can customize the size.  I cut long pieces for the dining room table and smaller pieces for the kids' tables.  I picked a color I can use for additional parties this year.  Also at Party City I picked up the little gems that are sprinkled on the table to look like snow.
  • We had also bought a Frozen poster for the girls' bedroom, so before they got to hang it, I snagged it to hang in the window as a backdrop for the food table. 
  • The silver place-card holders, plastic snowflakes and serving ware are all items we had.  Like I said, I raided the Christmas decorations which really went well with this theme! 
Things I made or printed for the party:
  • I cut out tons of snowflakes from coffee filters.  I even found a template for Olaf and Sven snowflakes here.  If you are unsure how to fold your coffee filter or paper, I would recommend checking out Martha Stewart tutorial. 
  • When kids were first arriving, we had coloring pages out on the little tables.  I printed several of each design from this website.
  • The cupcake toppers were part of a *free* party printables pack on Homeketeers!  Just be sure that whether you are using the free pack or purchasing the $1.99 expanded pack, you add the item to your cart and checkout.  There are a couple advertisements that might mislead someone to click on the wrong thing.  Once you check out you can download the printable pdfs.  
  • I drew a picture of Olaf on poster board to play pin the nose on Olaf.  Then I cut carrots out of orange scrapbook paper that I had on hand. 
  • To make the Happy Birthday banner, I picked scrapbook paper in colors that coordinated with the cupcake toppers.  I used my cricut die cutting machine to cut the shapes and letter, then glued them together and strung them on a ribbon. 
  • The food labels, water bottle labels and Sven Poop party favor toppers are all my own creation.  And I am including them below on the blog for your use!  The Sven Poop party favors were snack sized ziploc bags filled with Raisinettes, Whoppers and Milk Duds. 
food labels printable jpg.  Click to enlarge, right click to save.
Food we ate:
  •  Elsa's snowflakes = popcorn
  • Olaf's snowman buttons = raisinettes
  • Olaf's snowman arms = pretzel sticks
  • Olaf's snowman noses = baby carrots
  • Melted snowmen = bottled water
  • Elsa's icicles = string cheese and/or rock candy
  • Anna's chocolates (to stuff your face)
  • Kristoff's ice cubes = blue jello jiggler cubes
  • Snowballs = candy dipped marshmallows


water bottle labels printable jpg.  Click to enlarge, right click to save.
Sven poop party favor topper printable jpg.  Click to enlarge, right click to save.


Sunday, November 3, 2013

Planning for Thanksgiving

Two things you should know about me.
  1. Before I joined Pinterest a couple years ago, Martha Stewart was my go-to for craft, holiday and even recipe inspiration.
  2. I love binders, checklists and to-do lists.  I think I might be a little OCD.
In 2004 Martha Stewart published on her website a free printable Thanksgiving Planner with checklists and recipes.  Since being married, my husband and I have often hosted or assisted with much of the preparation for Thanksgiving Dinner.  I loved using the printable planner to help us get ready.  The planner is in a nice little binder stored in the cabinet above my mom's stove, complete with hand written notes and recipes.

This year I decided to create my own version of the Thanksgiving Planner since mine is tucked away in mom's kitchen 1800 miles away.  This planner reflects our family's version of a traditional turkey dinner.  I created a timeline, shopping list and several blank worksheets to help plan.  Please feel free to use this for your own dinner planning!

Download the pdf Planning Thanksgiving Dinner worksheets.


Saturday, August 31, 2013

A New School

My kids started a new school last week, more than 1700 miles away from their old friends and familiar territory.  They were beyond excited to ride the school bus and to make new friends.  They are already in love with the school and the playground that was installed just a month or two ago.

Here at home it takes a little more than a school bus and a shiny new school to get things running.  That's why it is so important to me that the kids have a dedicated backpack zone, homework station and paper bin.  I am all about setting a routine for consistency and so that everyone knows what to expect.  Since the Summer Fun schedule seemed to work so well, I made a schedule for the School Days too.

 I also enlisted hubby's help to create the perfect backpack zone.  There is a hook for each child (even the ones who aren't in school yet), bulletin boards and a magnetic dry erase board to keep track of school activities or other reminders.


Tuesday, August 27, 2013

Patriotic Cupcakes

For the Fourth of July we were headed to some close friends' house for a parade, bbq and fireworks.  I decided that whipping up a red, white and blue dessert would be my contribution.  Cupcakes are fun, quick and easily customizable, plus who doesn't love cupcakes?  So I gathered my helpers and made some super yummy vanilla cupcakes with vanilla frosting.  But like I said, I wanted to make a red, white and blue dessert, so these were no plain vanilla cupcakes.  I split both the cupcake batter and the frosting into three separate bowls each.  I dyed one blue, one red and left one white.

This creative dessert would work with your favorite vanilla cupcake recipe or even a boxed mix and can be customized with any colors you want!  Once the colors were to my liking (I use gel colors because it is easier to get a true red without diluting the batter or using ten times as much food coloring as necessary) I layered the three batters into the cupcake liners.  Sometimes I started with white, other times blue or red.  Sometimes the colors were on top of each other and sometimes next to each other.  The more creative and crazy, the better!

When the cupcakes cooled, I frosted them with my three colored frostings.  I filled the piping bag with all three colors at once, side by side.  The result was triple swirled frosting!  The colors did start to mix a little, so I think next time I will try another technique.  I've seen a couple that I am dying to try.